
Whether you’re considering rubber roofing for your property or simply want to understand what’s involved, knowing how the installation process works helps you make informed decisions. It also helps you recognise quality workmanship—and spot when corners are being cut.
This guide walks through the complete rubber roofing installation process, explaining each stage from initial preparation to final inspection. We’ll cover what professional installers do, why each step matters, and what you should expect if you’re having EPDM installed on your South Wales property.
Before Installation Begins
Proper preparation makes the difference between a rubber roof that lasts decades and one that fails prematurely. Professional installers invest significant time before any membrane touches the roof.
Site Survey and Assessment
Every quality installation starts with a thorough survey. The installer examines:
Existing roof condition – What covering is currently in place? What condition is it in? Can it be overlaid or must it be removed?
Deck condition – Are the underlying boards sound? Are there signs of rot, damage, or previous water ingress?
Roof dimensions – Accurate measurements determine membrane sizing and material quantities.
Penetrations and features – How many skylights, vents, pipes, or other penetrations need sealing? What edge details are required?
Access assessment – How will materials reach the roof? Are there any access restrictions affecting the work?
Integration points – How does the flat roof meet walls, existing roofs, or other structures?
This survey informs the installation plan, material order, and quotation. Skipping or rushing this stage leads to problems later.
Planning the Installation
With survey information gathered, the installer plans the work:
Membrane layout – EPDM comes in large sheets. Planning determines how to position the membrane for best coverage with minimal waste and fewest seams.
Sequencing – Which tasks happen in what order? How do different elements coordinate?
Weather window – EPDM installation requires dry conditions and temperatures above 5°C. Scheduling considers weather forecasts.
Material ordering – Membrane, adhesive, trims, insulation, and accessories are ordered based on survey measurements.
Material Delivery and Staging
Before installation day, materials arrive and are staged appropriately:
EPDM membrane – Large rolls stored flat, protected from damage.
Adhesive – Bonding adhesive and contact adhesive for different applications.
Edge trims and profiles – Metal or PVC trims for perimeter finishing.
Insulation boards – Rigid foam boards if insulation is being installed or upgraded.
Accessories – Corner pieces, pipe collars, seam tape, primers, and sealants.
Tools – Rollers, brushes, cutting equipment, and measuring tools.
Step 1: Removing the Existing Roof Covering
Most rubber roofing installations begin with removing what’s currently there.
When Removal Is Necessary
The existing covering typically comes off when:
- It’s in poor condition (cracked, blistered, water-damaged)
- Multiple layers have built up over time
- The deck beneath needs inspection or repair
- A clean, flat surface is required for optimal bonding
When Overlay Is Possible
Sometimes the new membrane can go over the existing covering:
- The existing surface is flat and firmly adhered
- No significant damage or deterioration exists
- The deck beneath is confirmed sound
- Building height and drainage aren’t compromised by added thickness
Overlay saves time and disposal costs but isn’t always appropriate. Professional assessment determines the right approach.
The Removal Process
When stripping is necessary:
Cutting and lifting – The old covering is cut into manageable sections and lifted from the deck.
Removing fixings – Nails, screws, and old adhesive residue are removed or flattened.
Clearing debris – All loose material is cleared, leaving a clean deck surface.
Bagging waste – Old roofing materials are bagged for disposal.
This stage is labour-intensive but essential for a proper installation base.
Step 2: Inspecting and Preparing the Deck
With the old covering removed, the deck is fully visible for the first time. This is when the true condition becomes apparent.
Deck Inspection
Installers check for:
Rot and decay – Soft, spongy, or discoloured boards indicate water damage.
Structural integrity – Are boards firmly fixed? Any movement or flex?
Surface condition – Is the surface reasonably flat and smooth?
Protruding fixings – Nail heads or screw tips that could damage the membrane.
Gaps or holes – Openings that need filling or boarding over.
Deck Repairs
Damaged areas require attention:
Replacing rotten boards – Sections with rot are cut out and replaced with new OSB or plywood. This is common on roofs that have leaked repeatedly.
Securing loose boards – Any movement is eliminated by additional fixing.
Flattening fixings – Protruding nail heads are driven flush or removed.
Filling gaps – Small gaps are filled; larger ones may need additional boarding.
The deck must be sound, dry, and reasonably smooth before proceeding. This stage can add time and cost if significant repairs are needed, but skipping it guarantees future problems.
Surface Preparation
With structural work complete:
Sweeping clean – All dust, debris, and loose material is removed.
Drying if necessary – The deck must be dry for adhesive bonding. Damp boards may need time to dry or gentle heating.
Checking flatness – Significant undulations are addressed. The membrane will follow the deck surface, so major irregularities show through.
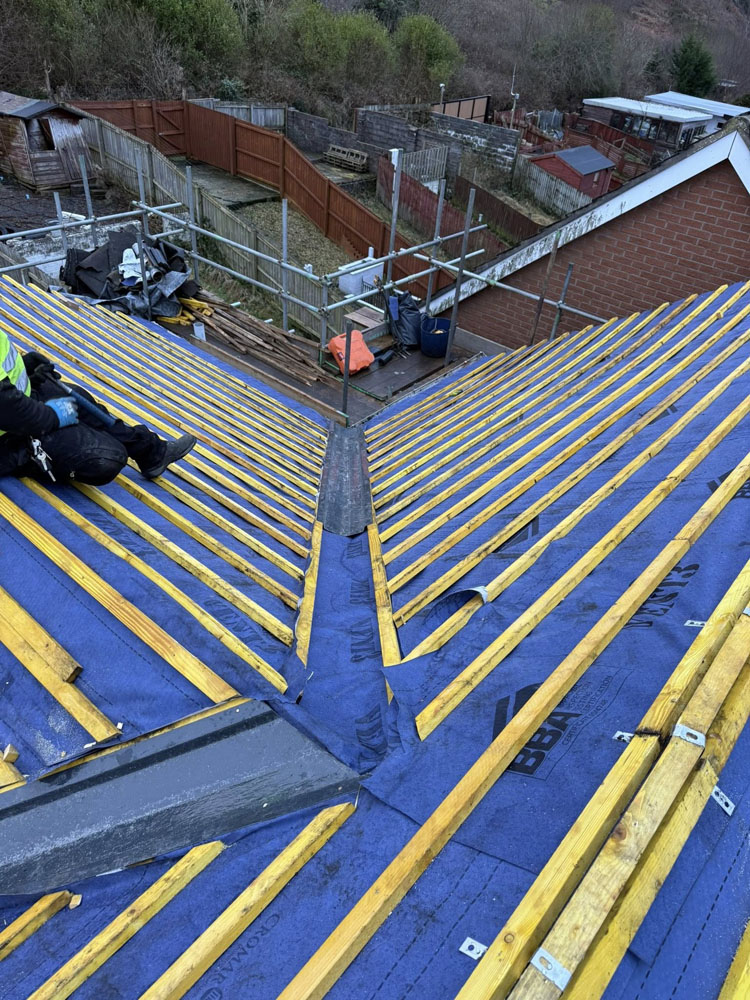
Step 3: Installing Insulation
Most modern rubber roofing installations include insulation beneath the membrane. This stage is crucial for thermal performance and often required by building regulations.
Why Insulation Matters
Insulation beneath the roof covering:
- Reduces heat loss through the roof
- Improves comfort in spaces below
- Helps meet building regulations requirements
- Provides a smooth, consistent surface for the membrane
- Can reduce condensation issues
Types of Insulation Used
PIR (polyisocyanurate) – Most common choice. Excellent thermal performance, lightweight, easy to cut and fit.
Phenolic foam – Similar performance to PIR, slightly better thermal values per thickness.
EPS (expanded polystyrene) – Lower cost but requires greater thickness for equivalent performance.
Installation Method
Insulation boards are laid across the deck:
Staggered joints – Boards are laid with joints staggered (like brickwork) to avoid continuous gaps.
Tight butting – Boards fit closely together with minimal gaps.
Mechanical fixing or adhesive – Boards are secured to the deck, preventing movement.
Taping joints – Joints may be taped to prevent thermal bridging and air leakage.
Cutting around penetrations – Boards are carefully cut to fit around pipes, vents, and other features.
The insulation creates the surface that the EPDM membrane will bond to, so it must be flat, stable, and properly secured.
Step 4: Positioning the EPDM Membrane
With the deck prepared and insulated, the membrane installation begins.
Unrolling and Positioning
EPDM membrane arrives in large rolls. For many domestic roofs, a single sheet covers the entire area.
Unrolling – The membrane is carefully unrolled across the roof surface.
Positioning – It’s adjusted to ensure adequate overlap at all edges for tucking into trims and forming upstands.
Relaxing – The membrane is left to relax for 30 minutes to an hour. This allows it to flatten and release any tension from being rolled.
Folding back – Once relaxed, the membrane is folded back on itself, exposing half the deck for adhesive application.
Cutting to Size
If the membrane needs trimming:
Rough cut first – Initial cuts leave generous allowance.
Final trimming later – Precise cuts happen after bonding, when the membrane is fixed in position.
Penetration cuts – Openings for pipes and vents are cut carefully, slightly undersized for a tight seal.
Step 5: Applying Bonding Adhesive
The adhesive bond is what holds the membrane permanently to the deck. This stage requires care and proper technique.
Types of Adhesive
Water-based bonding adhesive – Most common for full bonding. Applied to both surfaces, allowed to become tacky, then brought together.
Contact adhesive – Used for detail work, upstands, and areas needing immediate grab.
Solvent-based adhesive – Stronger initial tack, used in some applications but increasingly replaced by water-based options.
Application Process
Applying to the deck/insulation – Adhesive is rolled or brushed onto the exposed surface in an even coat.
Applying to the membrane – The underside of the folded-back membrane receives matching adhesive coverage.
Flash-off time – Both surfaces are left until the adhesive becomes tacky (typically 15–30 minutes depending on conditions). This is critical—bonding too early or too late compromises the bond.
Testing readiness – The adhesive should feel tacky but not transfer to a finger touch.
Working Conditions
Adhesive performance depends on conditions:
Temperature – Above 5°C for proper curing. Warmer is better (up to a point).
Humidity – Very high humidity slows drying.
No rain – Surfaces must stay dry during adhesive application and curing.
No frost – Frost prevents proper bonding.
Professional installers monitor conditions and won’t proceed if they’re unsuitable. This is one reason why rubber roofing installation schedules can shift with weather.
Step 6: Bonding the Membrane
With adhesive ready on both surfaces, the membrane is bonded to the deck.
The Bonding Process
Careful lowering – The folded membrane is slowly lowered onto the adhesive-coated deck, starting from the fold line.
Avoiding air pockets – As the membrane contacts the deck, it’s smoothed outward to push air ahead of it rather than trapping bubbles beneath.
Progressive bonding – Working from the fold line outward ensures consistent contact without trapping air.
Rolling – A heavy roller presses the membrane firmly onto the deck, ensuring full contact across the entire surface.
Repeating for the Second Half
With half the membrane bonded:
Folding the other half – The unbonded section is folded back.
Applying adhesive – Both surfaces receive adhesive as before.
Flash-off – Waiting for proper tack.
Bonding – Same careful lowering and rolling process.
Quality Checks
After bonding:
Visual inspection – Checking for air bubbles, wrinkles, or unbonded areas.
Addressing issues – Small bubbles can be slit, adhesive added, and re-bonded. Significant problems may require lifting and re-doing sections.
The bonded membrane should lie flat and smooth across the entire roof surface.
Step 7: Installing Edge Details
Edge finishing is where many flat roofs fail. Proper edge details determine long-term performance.
Types of Edge Details
Drip edges – Metal profiles at roof edges that direct water into gutters and prevent it running down fascias.
Termination bars – Strips that secure the membrane edge where it can’t be tucked.
Trim profiles – Various shapes for different edge conditions.
Corner pieces – Pre-formed corners for neat, watertight junctions.
Installation Process
Fitting drip edges – Metal profiles are fixed to the roof edge, overhanging into the gutter.
Bonding membrane to trim – The membrane edge is bonded over or into the trim profile using contact adhesive.
Sealing – All edges are sealed with appropriate sealant or tape.
Corner treatment – Corners receive special attention—either pre-formed pieces or carefully folded and sealed membrane.
Every edge must be watertight. Water finding a way in at an edge quickly causes damage and undermines the entire installation.
Step 8: Forming Upstands
Where the flat roof meets walls or other vertical surfaces, upstands are formed.
What Upstands Do
Upstands turn the waterproof membrane from the horizontal roof surface up the vertical wall, ensuring water can’t penetrate at this junction. Standard upstand height is typically 150mm minimum.
Forming the Upstand
Cutting the membrane – Allowance is left for turning up the wall.
Applying adhesive – Contact adhesive goes on both the wall surface and the membrane.
Bonding – The membrane is pressed firmly onto the wall, working from the bottom up.
Corner treatment – Internal and external corners are carefully formed with folds or corner pieces to maintain waterproofing.
Finishing the Top Edge
The top of the upstand must be secured and sealed:
Termination bar – A metal strip is fixed through the membrane into the wall, creating a mechanical fixing.
Sealant – The gap above the bar is sealed with appropriate mastic.
Flashing – In some cases, additional flashing covers the termination for extra protection.
Alternatively, the membrane may be tucked into a chase (groove cut into the masonry) and sealed, or dressed beneath existing cladding.
Step 9: Sealing Penetrations
Every pipe, vent, or feature that passes through the roof needs careful sealing.
Common Penetrations
- Soil vent pipes
- Extractor fan outlets
- Boiler flues
- Cables and wires
- Skylight kerbs
- Roof lantern bases
Sealing Methods
EPDM pipe collars – Pre-formed rubber boots that fit around pipes. They bond to the membrane surface and grip the pipe, creating a watertight seal.
Formed upstands – Around larger features like skylights, the membrane is turned up the kerb and sealed, similar to wall upstands.
Liquid sealants – Compatible liquid rubber can seal awkward shapes or reinforce other sealing methods.
Seam tape – Self-adhesive EPDM tape seals joints and reinforces vulnerable areas.
Quality of Penetration Sealing
Penetrations are common failure points on flat roofs. Quality installation means:
- Proper sizing of collars and cuts
- Full adhesive coverage
- No gaps or lifted edges
- Neat, professional finish
- Use of compatible products throughout
Step 10: Final Inspection and Completion
Before the job is handed over, thorough inspection ensures everything meets standards.
What’s Checked
Membrane surface – No bubbles, wrinkles, punctures, or damage.
All bonds – Edges, upstands, and penetrations fully adhered.
Edge details – Drip edges secure, trims properly fitted, corners watertight.
Upstands – Correct height, properly bonded, top edges sealed.
Penetrations – All pipes and vents properly sealed.
Overall appearance – Neat, professional finish throughout.
Addressing Any Issues
If inspection reveals problems, they’re corrected before completion:
- Bubbles are slit, re-adhered, and sealed
- Loose edges are re-bonded
- Missing sealant is applied
- Any damage is repaired
Site Cleanup
Professional installers leave the site clean:
- All waste materials removed
- Tools and equipment cleared
- Surrounding areas cleaned
- Gutters checked and cleared
Handover
The completed installation is handed over with:
- Walkthrough of completed work
- Maintenance guidance
- Warranty documentation
- Invoice and payment completion
How Long Does Installation Take?
Installation duration depends on roof size and complexity.
Typical Timescales
Small porch or bay window – Half a day to one day
Single garage roof – One day
Double garage – One to two days
Medium extension – One to two days
Large extension – Two to three days
Complex or large projects – Three days or more
These assume reasonable conditions and no major surprises with deck condition.
Factors Affecting Duration
Deck repairs – Significant deck work adds considerable time.
Complexity – Multiple penetrations and difficult details slow progress.
Weather delays – Rain or cold may pause work.
Access difficulties – Restricted access slows material handling.
What to Expect During Installation
If you’re having rubber roofing installed at your property in South Wales—whether in Cardiff, Swansea, Merthyr Tydfil, Aberdare, or elsewhere—here’s what to expect:
Before Work Starts
- Confirmation of start date
- Discussion of access requirements
- Any preparation you need to do (moving vehicles, clearing access)
During Installation
- Installers arrive and set up
- Some noise from removal work and fixing
- Materials carried across your property if roof isn’t directly accessible
- Adhesive has a mild smell but isn’t offensive
- Installers may need water access for cleanup
Minimal Disruption
Rubber roofing installation is relatively unobtrusive:
- No hot bitumen smells (unlike felt)
- No naked flames on the roof
- No extended curing periods blocking access
- Work typically completes in one to two days
After Completion
- Walkthrough of finished work
- Explanation of any maintenance requirements
- Documentation provided
- Site left clean and tidy
Signs of Quality Installation
Knowing what good installation looks like helps you assess workmanship.
What to Look For
Smooth, flat membrane – No wrinkles, bubbles, or raised areas.
Neat edge details – Trims properly aligned, corners well-formed.
Consistent upstands – Even height, fully bonded, neatly finished.
Professional penetration sealing – Collars fitted correctly, no gaps visible.
Clean workmanship – No adhesive smears, no messy sealant, tidy overall appearance.
Red Flags
Visible bubbles or wrinkles – Indicates poor bonding technique.
Gaps at edges or upstands – Water ingress points waiting to happen.
Rushed penetration sealing – Pipes not properly collared, gaps visible.
Membrane not fully adhered – Loose areas that will lift in wind.
Messy finish – Suggests lack of care throughout.
Why Professional Installation Matters
While DIY rubber roofing is possible for simple projects, professional installation offers significant advantages:
Experience – Installers have completed many roofs and know how to handle challenges.
Proper technique – Correct adhesive application, bonding, and detailing.
Quality materials – Access to professional-grade products.
Warranty protection – Both material and workmanship guarantees.
Efficiency – Faster completion with less risk of errors.
Problem-solving – Ability to handle unexpected issues.
At M&J Roofing, our installers are trained in proper EPDM installation techniques. We follow the process outlined in this guide on every project, ensuring your rubber roof performs as it should for decades to come.
Ready to Get Started?
Understanding how rubber roofing is installed helps you appreciate both the process and the value of professional workmanship. Each step matters—from initial survey through final inspection—and doing them all properly is what creates a roof that lasts 30 to 50 years.
If you’re considering rubber roofing for your property, contact M&J Roofing for a professional assessment. We’ll survey your roof, explain exactly what’s involved, and provide a clear quotation for the work. Whether you’re in Cardiff, Swansea, Newport, the valleys, or anywhere across South Wales, we deliver quality installations that stand the test of time.
Get in touch to arrange your no-obligation survey.
